Physical Address
304 North Cardinal St.
Dorchester Center, MA 02124
Physical Address
304 North Cardinal St.
Dorchester Center, MA 02124

When redesigning a website we often face the dilemma on what to do with the old image URLs. Some website owners simply ignore the old image URLs and just redirect the HTML pages to the new URL version and launch the website, although for websites with a handful of pages it may not affect the organic performance negatively however if this strategy is followed for a website which has a huge number of pages then it may impact the organic performance of the website negatively.
Let us consider the two URL versions mentioned below as old and new
Old: www.abc.com/images/old-image.jpg
New: www.abc.com/images/new-image.jpg
Image URL’s are also indexable assets just like a webpage:
Image URLs such as www.abc.com/images/old-image.jpg are indexed by search engines separately, therefore if the old image URL is not redirected to its new version then the search engines will treat is as a 404 page which may lead to traffic loss
Often times 3rd party websites may link to your images which results in a backlink for your website and helps with the domain authority, if the backlinks are pointing to the old image URL and we are not redirecting that old Image URL to the new version it will result in a broken backlink and also negatively affect the domain authority which will affect the performance negatively
Images also bring visitors to your website, if we take google search engine as an example you may have noticed that for some specific type of queries google displayed a few image results in the SERPs at the same time google also has a image search feature which shows only images from websites which are relevant to the user query, therefore if your website images are showing up for such queries and you donot redirect the old image URL to the new URL then you will lose the traffic that your website was getting from these image searches.
Now that we have already discussed the importance of image redirections let’s learn how to properly redirect the old image URL to the new URL.
The steps below will be applicable when you are redesigning your existing website which is causing some URL changes and image URL changes.
You will also need a tool called Screaming Frog to follow the steps below
You will also need to have a Screaming Frog crawl backup of your old website
I will not be showing you how to install screaming frog as it is a simple process, Once you have installed screaming frog open the application on your desktop and follow the below steps
On the top left corner click on “Configuration” from the dropdown goto “Spider” goto “Advanced”, and tick “Always follow redirects”
Click on “Crawl” scroll down to the “XML Sitemaps” section and tick “Auto discover XML sitemaps” then tick “Crawl these sitemaps” and enter the sitemap URL of your old website in the entry field just below it, click “OK”
On the top left corner click on “Mode” and ensure “Spider” is selected
Enter your homepage URL in the field “Enter URL to Spider”

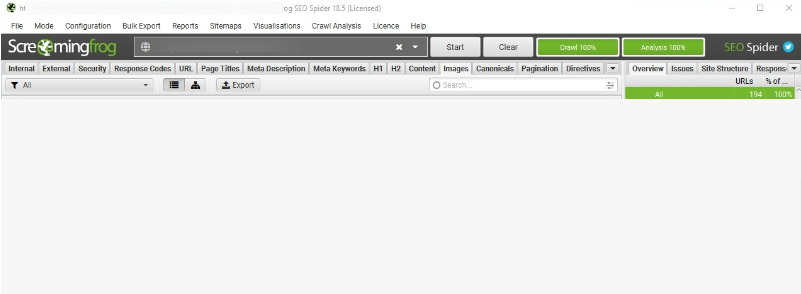
Click on “Start”
Now the tool will start crawling your website and discover all the assets such as HTML pages, Images, CSS, JS etc, once the crawl has finished the progress bar should display 100%
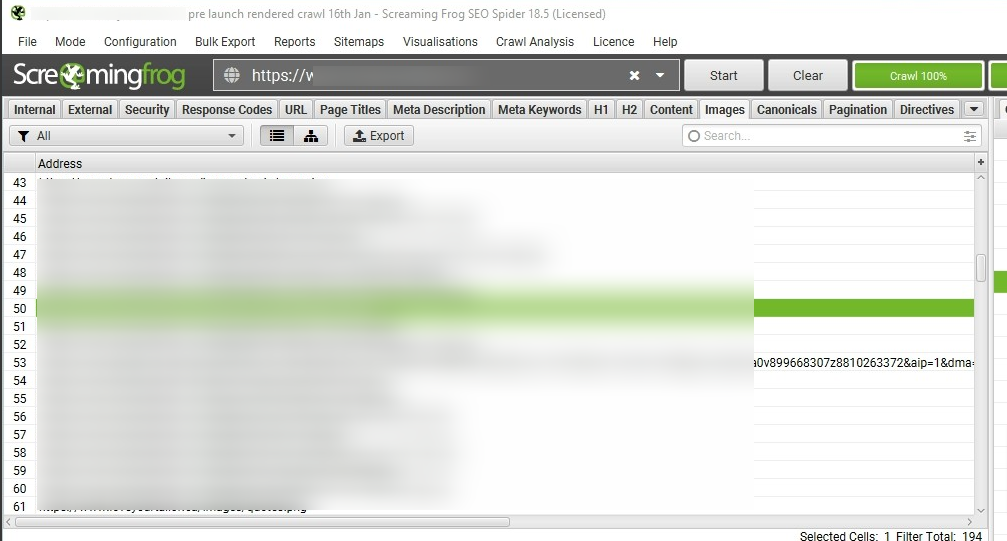
Once the progress bar reaches 100%, click on the “Images” tab

This will give you a list of all the images that the tool discovered on your website
Click on “Export” from the table block header and export it to a Excel document

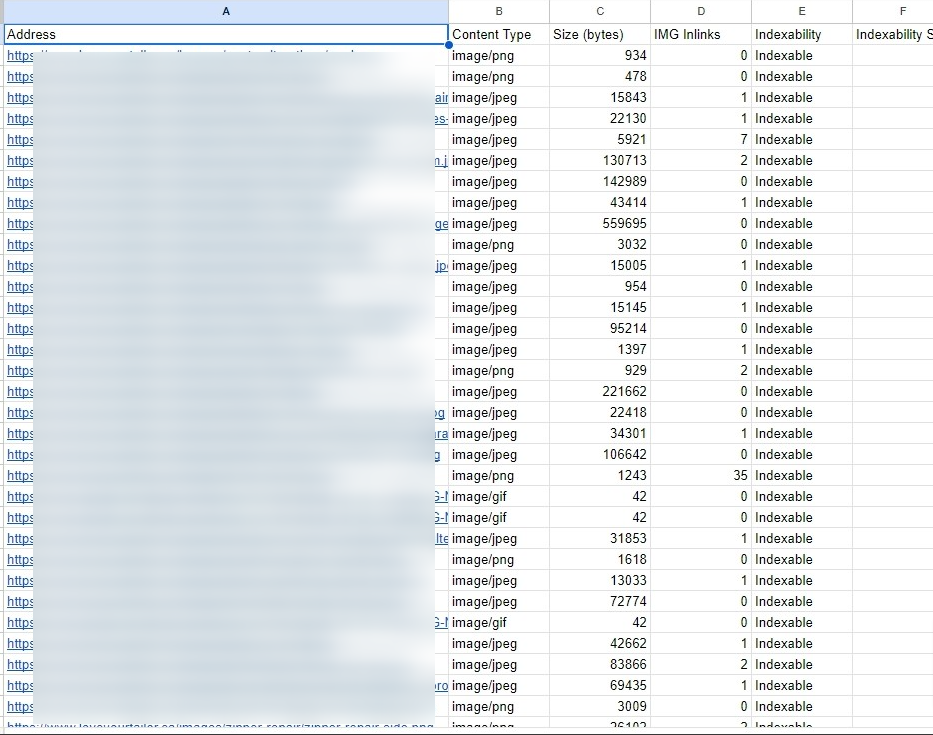
The exported excel document should look something like this

You can also exclude the rows where the Indexable status is “Non Indexable”
This Excel will be your backup for auditing the image redirects after the new website is launched.
Once you have this data now you can start configuring the redirects, if the new website has moved images to a new folder you can simply add a rule to your htaccess file for redirecting the old image URL’s to the new version.
If you have removed some old images and replaced them with new ones then you can manually 301 redirect the URL of the removed old image to the new image URL
If you have removed 10 images from your old website then you may wonder to which URL should you redirect them to, there are a few approaches to this but I prefer redirecting the URL of the removed images to the most similar image on the new websites, Let’s image that you have removed an image of a truck which was previously there on the old website, in this case since you donot have a new version of that image you can simple redirect it to a another image of a truck on your new website
Once you have configured the redirects and launched the new website now its time for auditing the redirects to ensure they are functioning properly
Auditing Image URL redirects from old to new version:-
Open up Screaming frog application on your desktop
On the top left corner click on “Configuration” from dropdown goto “Spider” goto “Advanced”, tick “Always follow redirects”
On the top left corner click on “Mode” and ensure “List” is selected
Now open the old Excel file and copy all the URL’s from column “A” and come back to Screaming Frog window
Click on “Upload” and then click on “Paste” click “OK”

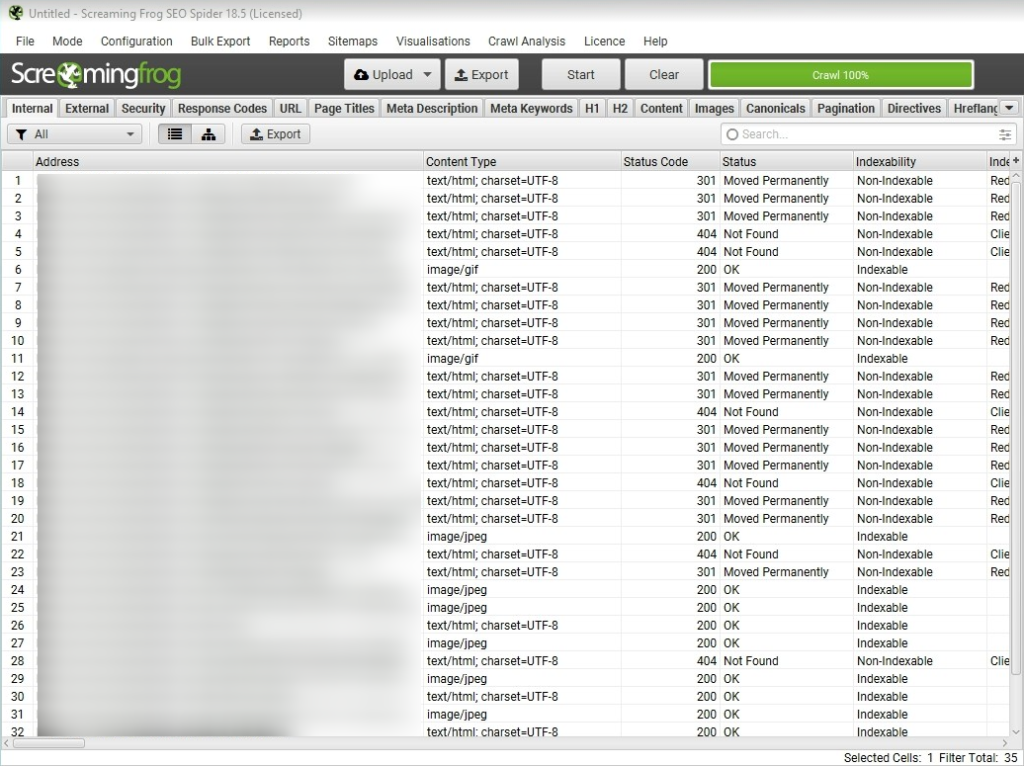
The tool will start checking the old image URL status and once it has finished you will be presented with a table like this

Click on the “Status Code” column to sort it by status and look for “404s”, if you find 404 status code it means that the redirection for those URL’s are not working properly, if you find 301’s and 200 it means that the images are either redirected properly or the URL has not changed in the new website.
If you face any issues in following the above process you can get in touch with me by using the contact form which can be access from the link at the top right corner of the website